InfraSOS Self Service Password Reset
Getting start with our Active Directory self service portal.
Contents
Step 1 - Join VM to Active Directory
Step 2 - Create Active Directory Groups
Step 3 - Delegation Control for InfraSOS Server
Step 4 - Portal https Certificate
Step 5 - Setup Password Expiration Notifications
Step 6 - Password Policy Settings
Step 7 - Self-Service Portal Header Customization
Step 8 - Active Directory Reporting & Management
Server Logs / Error Logs / Troubleshooting
Download Links
Step 1 - Join VM to your Active Directory Domain
Before you can use or login to the portal you will need to join the VM to your domain.
- On the Desktop, click the Start button, type Control Panel, and then press ENTER.
- Navigate to System and Security, and then click System.
- Under Related settings, click Rename this PC (advanced).
- Under the Computer Name tab, click Change.
- Under Member of, click Domain, type the name of the domain that you wish this server to join, and then click OK.
- Click OK in the Computer Name/Domain Changes dialog box, and then restart the server.
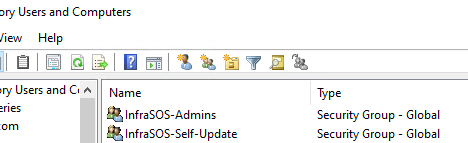
Step 2 - Create AD Security Groups (Control User Permissions)
InfraSOS Self Service Portal requires the following Active Directory security groups setup in order for the portal to work correctly, otherwise you will get errors loading pages:
Note: The group name must be named exactly as per the group name in the table.
| Group Name | Description |
| InfraSOS-Admins | This is to give admins full access to all portal admin settings, such as configuration, running reports, viewing dashboard and complete setup settings. |
| InfraSOS-Self-Update | This is to allow users the permission to be able to update their Active Directory profile under Update Profile within the portal. User not in this group will only have read only access to their profile. |
All domain users will have access to login and reset their password, use employee search and view their profile attributes.
Step 3 - Active Directory Delegation Control For InfraSOS Server
In order for the local service account (InfraSOS AD Self-Service) on the InfraSOS server to manage password resets or report actions and updates, the server requires deletion control permissions with your Active Directory domain.
Open your Active Directory Users and Computers console
Right click on your domain and select Delegation Control

Select Next

Press Add

Click on Object Types

Select Computers and deselect everything else and press OK

Next is to search for the InfraSOS server in your domain. The name will depend on what you've called the host name in your AD . Once you've found it, press next

On the next screen are the permissions we're going to give this host. Select the following
- Create, delete and manager user accounts
- Reset user passwords and force password change at next logon
- Read all user information
Then press next

Wait for it to process and you will receive the following summary page and press Finish

Log back into your InfraSOS server and restart the service via the desktop shortcuts
- Stop InfraSOS Service
- Start InfraSOS Service
Or manually restart the service within Windows Services:

Step 4 - Create Certificate for https (optional)
If you would like to enable https for your portal access simply use a certificate if you're using an internal PKI or you can also create a self signed certificate.
Login to the portal as an admin (Admins are users in the InfraSOS-Admins Active Directory group you created in step 2).
The login URL is:
http://localhost
Browse to Admin Settings / Portal Certificate

Select 'True' on Enable https
Select your certificate you've created in the drop down menu.
If you don't see your certificate, make sure you've added it to the local computer certificate store:

Once you've pressed update to apply the certificate configuration, close down the browser and restart the InfraSOS service via the desktop shortcuts:
- Stop InfraSOS Service
- Start InfraSOS Service
Or you can manually restart the Windows service - InfraSOS AD Self-Service
Now you can login using the portal using https using the DNS name you specified in your certificate. For example my certificate DNS name is ADReportTool, so my new login is:
https://adreporttool
Note: If you're are using a self signed certificate, remember to deploy this certificate to all your users computers via GPO.
Step 5 - Setup AD Password Expiry Email Reminders
1) SMTP Configuration
To setup Active Directory password expiration notification emails go to Admin Settings / Email Notifier
Under SMTP Configuration add in your SMTP server settings with the mail box that will send the password reminder emails (Note: make sure your SMTP server is accessible to the InfraSOS server):

Once you've saved your SMTP settings, you can now test your configuration to make sure it works and your SMTP server connectivity from the InfraSOS server works:
2) Test SMTP Connectivity
Further down under Test SMTP Settings simply press the green Test SMTP Connection button

Log into your mail sender mail box to confirm you've received a test email

3) Enable / Disable Password Notification Service
Once you've confirmed your SMTP is working, you can now enable password reminder emails to start sending based on users whose password expires 14, 7 & 3 days. Once you select Enable this creates a Windows Task schedule called InfraSOS and runs everyday at 10 am based on the timezone your server is configured for. If you would like to disable this, simply select Disable option and this automatically disables the Windows task schedule and all email reminder emails.


4) Edit Password Reminder Email Template
To view the current email template, press the yellow button View Email Template and this is the email that is sent to users. If you would like to make edits to this email, open the following PowerShell module file in Powershell ISE or Notepad "C:\InfraSOS\Email\Get-Emailbody.psm1". Once you've edited and saved this Powershell module file, you can reload this page to view the updated email template.

Step 6 - Password Policy
If users reset their password within the portal, it automatically generates a completely randomized secure password that meets all modern security standards and requirements (a combination of upper, and lower case alphabets, numbers, and special characters) with a minimum password length of 8 characters.
Users passwords are set to change at next login after they self serve reset their password. If you need to change the minimum password reset length simply update using the form in Admin Settings / Password Policy

Step 7 - Portal Header Customization
Admins can customize the header buttons within the portal to link to any website or internal web applications, making it easy for users to navigate to your company applications:

Navigate to Portal Customization / Customize Header Icons
The portal currently supports 5 header buttons. Simply replace all the fields with whichever icon, link, name you would like. Icons can be found on https://pictogrammers.com/library/mdi/. Icon name goes into the Icon x logo field

Step 8 - Active Directory Reporting & Management
1) Active Directory User Reports
Within the portal, Admins can run 5 built-in reports under Admin Reports:
- Disabled Users
- Password Expired Users
- Risky Users - Password Set to Never Expire
- Users Never Logged On
- Users Not Logged in Past 60 Days
There is also a Dashboard view, that gives an overview of your user metrics such as:
- Total Disabled Users
- Total Number of users Not Logged in past 60 Days
- Total Password Resets in 7 Days
- Total Number of Users with Password Expired
- Total Number of Users set to Never Expire
- Total Number of Users Never Logged In
- Total Number of Domain Admins
- Total Number of Recently Modified Users in Last 7 Days

2) Report Actions
Within some of these reports you can perform actions such as Disable, Enable & remove password never expire setting.
Note: Users in the default Users container can't have actions applied to them only users in OUs. This is due to AD security controls on containers.

3) Reset a Users Password
Admins can reset any users password via Admin Settings / Reset Users Password
Simply search for a user by their First / Last name. Then click on the user and once you've clicked on a selected user it automatically resets their password. The new password will be displayed in the box labeled New Password:


4) Email Logs
You can view recent emails that have been sent to users, to confirm that emails are being sent out to users whose password is expiring. Under Dashboard / Todays Email Log press the blue Open button will show the latest log from today showing if emails have been sent out today. To view all previous days emails that have been sent, go to the following folder on the InfraSOS server C:\InfraSOS\Log:

5) InfraSOS Server Error Logs
All logs related to InfraSOS portal are on the following directory on the server:
C:\InfraSOS\Log\Error